1) Ubuntu Installer and 2) Knoppix. Both of those come with gzip.
I've never actually ever used gzip.
Hello, I was never very good at linux scripting, and now I've forgotten
much what I did know. I hope somebody here can help me incorporate gzip
with the dd copy lines I use for backing up laptop to an external drive.
The two different thumb drives I use to boot laptop and copy SDD are
1) Ubuntu Installer and 2) Knoppix. Both of those come with gzip.
I've never actually ever used gzip.
Here's the lines I use to copy the SDD contents to an external drive:
## first do fdisk -l to sort out the devices
sudo mkdir -p /mnt/sdb1 (creating a mount point)
sudo mount -t ntfs /dev/sdb1 /mnt/sdb1
sudo mkdir -p /mnt/sdb1/images (if u don't already have that directory)
sudo dd if=/dev/nvme0n1 of=/mnt/sdb1/images/asyymmdd.img bs=4096 conv=notrunc,noerror
Hello, I was never very good at linux scripting, and now I've forgotten much what I did know. I hope somebody here can help me incorporate gzip with the dd copy lines I use for backing up laptop to an external drive. The two different thumb drives I use to boot laptop and copy SDD are
1) Ubuntu Installer and 2) Knoppix. Both of those come with gzip.
I've never actually ever used gzip.
Here's the lines I use to copy the SDD contents to an external drive:
## first do fdisk -l to sort out the devices
sudo mkdir -p /mnt/sdb1 (creating a mount point)
sudo mount -t ntfs /dev/sdb1 /mnt/sdb1
sudo mkdir -p /mnt/sdb1/images (if u don't already have that directory)
sudo dd if=/dev/nvme0n1 of=/mnt/sdb1/images/asyymmdd.img bs=4096 conv=notrunc,noerror
Here's the lines to restore the SDD if I ever need to:
sudo mkdir -p /mnt/sdb1 (creating a mount point)
sudo mount -t ntfs /dev/sdb1 /mnt/sdb1
sudo dd if=/mnt/sdb1/images/asyymmdd.img of=/dev/nvme0n1 bs=4096 conv=notrunc,noerrer
Thanks in advance.
Bill S.
On 2023-11-02, bilsch01 wrote:^^^^^ Ugh, that should be "NO of="
Hello, I was never very good at linux scripting, and now I've forgotten
much what I did know. I hope somebody here can help me incorporate gzip
with the dd copy lines I use for backing up laptop to an external drive.
The two different thumb drives I use to boot laptop and copy SDD are
1) Ubuntu Installer and 2) Knoppix. Both of those come with gzip.
I've never actually ever used gzip.
Here's the lines I use to copy the SDD contents to an external drive:
## first do fdisk -l to sort out the devices
sudo mkdir -p /mnt/sdb1 (creating a mount point)
sudo mount -t ntfs /dev/sdb1 /mnt/sdb1
sudo mkdir -p /mnt/sdb1/images (if u don't already have that directory)
sudo dd if=/dev/nvme0n1 of=/mnt/sdb1/images/asyymmdd.img bs=4096
conv=notrunc,noerror
You'd need something to the effect of:
dd if=/the/device (NO if=) [...] | gzip > /mnt/sdb1/images/xx.img.gz
On 11/2/2023 3:52 AM, bilsch01 wrote:
Hello, I was never very good at linux scripting, and now I've forgotten much what I did know. I hope somebody here can help me incorporate gzip with the dd copy lines I use for backing up laptop to an external drive. The two different thumb drives I use to boot laptop and copy SDD are
1) Ubuntu Installer and 2) Knoppix. Both of those come with gzip.
I've never actually ever used gzip.
Here's the lines I use to copy the SDD contents to an external drive:
## first do fdisk -l to sort out the devices
sudo mkdir -p /mnt/sdb1 (creating a mount point)
sudo mount -t ntfs /dev/sdb1 /mnt/sdb1
sudo mkdir -p /mnt/sdb1/images (if u don't already have that directory)
sudo dd if=/dev/nvme0n1 of=/mnt/sdb1/images/asyymmdd.img bs=4096 conv=notrunc,noerror
Here's the lines to restore the SDD if I ever need to:
sudo mkdir -p /mnt/sdb1 (creating a mount point)
sudo mount -t ntfs /dev/sdb1 /mnt/sdb1
sudo dd if=/mnt/sdb1/images/asyymmdd.img of=/dev/nvme0n1 bs=4096 conv=notrunc,noerrer
Thanks in advance.
Bill S.
On 11/2/2023 6:39 AM, Paul wrote:<...snipped...>
On 11/2/2023 3:52 AM, bilsch01 wrote:
Hello, I was never very good at linux scripting, and now I've forgotten much what I did know. I hope somebody here can help me incorporate gzip with the dd copy lines I use for backing up laptop to an external drive. The two different thumb drives I use to boot laptop and copy SDD are
1) Ubuntu Installer and 2) Knoppix. Both of those come with gzip.
I've never actually ever used gzip.
Here's the lines I use to copy the SDD contents to an external drive:
It is possible, for example, that only certain areas of the thing need to be backed up.
https://clonezilla.org/show-live-doc-content.php?topic=clonezilla-live/doc/01_Save_disk_image
Say, for example, we purchased a HDD exactly the same size as the NVMe. It turns out, that the "faked" size of the devices, can be the same, for commonality.
I checked a 4TB SSD, a 4TB WD drive, a 4TB Seagate drive, all were 4,000,787,030,016 bytes.
And that is a fake size based on CHS principles. When CHS is involved, the number is
evenly divisible by 63. Each of these devices has more bytes inside, but we cannot
have them.
On 03/11/2023 15:24, Paul wrote:
On 11/2/2023 6:39 AM, Paul wrote:<...snipped...>
On 11/2/2023 3:52 AM, bilsch01 wrote:
Hello, I was never very good at linux scripting, and now I've forgotten much what I did know. I hope somebody here can help me incorporate gzip with the dd copy lines I use for backing up laptop to an external drive. The two different thumb drives I use to boot laptop and copy SDD are
1) Ubuntu Installer and 2) Knoppix. Both of those come with gzip.
I've never actually ever used gzip.
Here's the lines I use to copy the SDD contents to an external drive:
<...snipped...>
It is possible, for example, that only certain areas of the thing need to be backed up.
https://clonezilla.org/show-live-doc-content.php?topic=clonezilla-live/doc/01_Save_disk_image
Say, for example, we purchased a HDD exactly the same size as the NVMe. It >> turns out, that the "faked" size of the devices, can be the same, for commonality.
I checked a 4TB SSD, a 4TB WD drive, a 4TB Seagate drive, all were 4,000,787,030,016 bytes.
And that is a fake size based on CHS principles. When CHS is involved, the number is
evenly divisible by 63. Each of these devices has more bytes inside, but we cannot
have them.
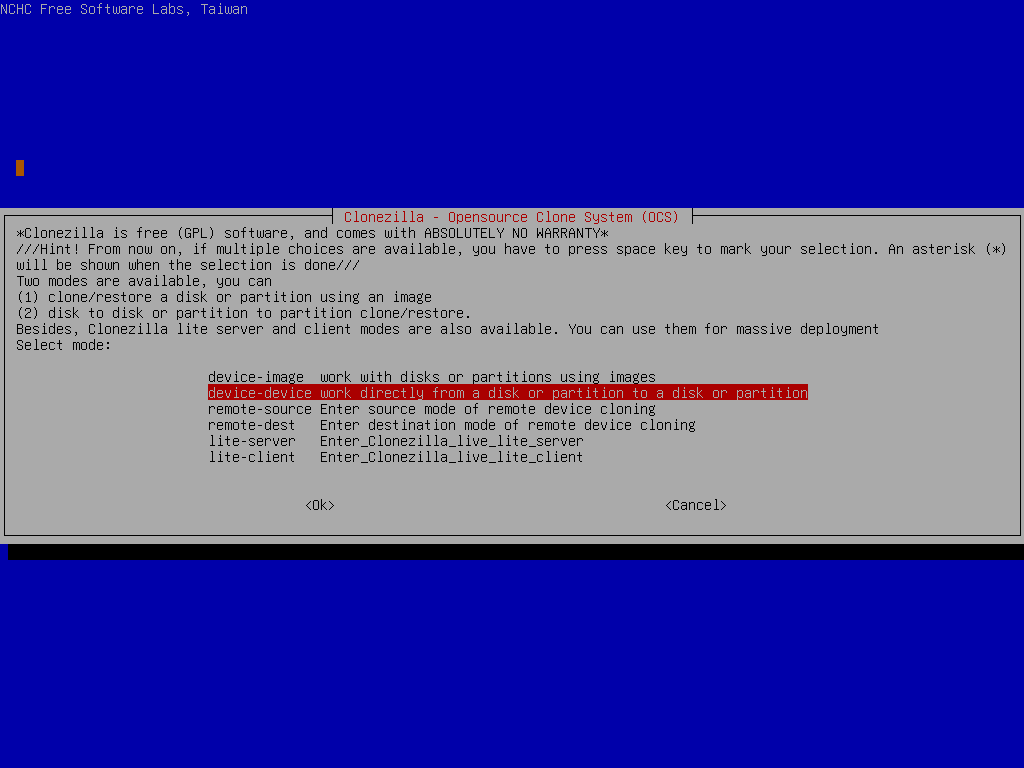
Did I misunderstand, or did you mean https://clonezilla.org/fine-print-live-doc.php?path=clonezilla-live/doc/03_Disk_to_disk_clone
(works for me; without the TORAM option makes a clone --identical -- HDD)
-- No Micro$oft products were used in the URLs above, or in preparing this message. Recommended reading:
http://www.catb.org/~esr/faqs/smart-questions.html#befor
On 11/2/2023 3:52 AM, bilsch01 wrote:
Hello, I was never very good at linux scripting, and now I've forgotten much what I did know. I hope somebody here can help me incorporate gzip with the dd copy lines I use for backing up laptop to an external drive. The two different thumb drives I use to boot laptop and copy SDD are
1) Ubuntu Installer and 2) Knoppix. Both of those come with gzip.
I've never actually ever used gzip.
Here's the lines I use to copy the SDD contents to an external drive:
## first do fdisk -l to sort out the devices
sudo mkdir -p /mnt/sdb1 (creating a mount point)
sudo mount -t ntfs /dev/sdb1 /mnt/sdb1
sudo mkdir -p /mnt/sdb1/images (if u don't already have that directory)
sudo dd if=/dev/nvme0n1 of=/mnt/sdb1/images/asyymmdd.img bs=4096 conv=notrunc,noerror
Here's the lines to restore the SDD if I ever need to:
sudo mkdir -p /mnt/sdb1 (creating a mount point)
sudo mount -t ntfs /dev/sdb1 /mnt/sdb1
sudo dd if=/mnt/sdb1/images/asyymmdd.img of=/dev/nvme0n1 bs=4096 conv=notrunc,noerrer
Thanks in advance.
Bill S.
sudo dd if=/dev/nvme0n1 of=/mnt/sdb1/images/asyymmdd.img bs=4096 conv=notrunc,noerror
becomes
sudo dd if=/dev/nvme0n1 bs=4096 conv=notrunc,noerror | gzip -3 > /mnt/sdb1/images/asyymmdd.img.gz
The dd program, when you remove the "of" specification, uses STDOUT.
GZIP accepts piped input. There are options of --fast and --slow which correspond to -1 and -9. The value -3 for compression is the default,
and is shown as an example of a passed parameter. You might want to
test the output, and see if the size changes or not
... | gzip -1 | wc -c # count the bytes of output
... | gzip -9 | wc -c # count the bytes of output
With gzip, you have to be careful of the syntax,
so the original file is not deleted. That's what I spent
most of my time playing with, is checking for deletion.
*******
Later:
gzip -c -d /mnt/sdb1/images/asyymmdd.img.gz | sudo dd of=/dev/nvme0n1 bs=4096 conv=notrunc,noerrer
The -c sends the output to STDOUT.
The -d says "switch to decompression mode".
The input file is a compressed one.
Sending to STDOUT, also stops deletion of the input file.
The dd command, when there is no "if" specification, it inputs from STDIN.
The output file, the target, is the nvme.
*******
An alternate compressor you can try, is "pigz".
sudo apt install pigz
man pigz
Syntax is the same as gzip, and it accepts a -p 4
parameter, which is the number of processor
cores to use for compression.
If you use exactly the same compression syntax as the gzip -3
example, it uses all the cores on your CPU.
pigz -3 # On a 4C 8T processor, the default is -p 8
pigz output is ".gz" as before. gzip can be used for decompression.
pigz can be used for decompression. But during decompression, it
only uses one core. One claim I've seen, is decompression is typically faster, so the lack of multithreading is not the end of the world.
It is compression that needs the horsepower.
You can use "top" or "gnome-system-monitor" to monitor the amount
of CPU usage during compression.
Anyway, I'm sure you have a whole collection of compressor commands.
There are compressors to produce smaller output, but they don't
run as fast.
Paul
On 11/2/2023 3:39 AM, Paul wrote:
[...]
With gzip, you have to be careful of the syntax,
so the original file is not deleted. That's what I spent
most of my time playing with, is checking for deletion.
Can you be more specific about what syntax will result in deletion of original file?
On 11/2/2023 6:39 AM, Paul wrote:
On 11/2/2023 3:52 AM, bilsch01 wrote:
Hello, I was never very good at linux scripting, and now I've forgotten much what I did know. I hope somebody here can help me incorporate gzip with the dd copy lines I use for backing up laptop to an external drive. The two different thumb drives I use to boot laptop and copy SDD are
1) Ubuntu Installer and 2) Knoppix. Both of those come with gzip.
I've never actually ever used gzip.
Here's the lines I use to copy the SDD contents to an external drive:
## first do fdisk -l to sort out the devices
sudo mkdir -p /mnt/sdb1 (creating a mount point)
sudo mount -t ntfs /dev/sdb1 /mnt/sdb1
sudo mkdir -p /mnt/sdb1/images (if u don't already have that directory)
sudo dd if=/dev/nvme0n1 of=/mnt/sdb1/images/asyymmdd.img bs=4096 conv=notrunc,noerror
Here's the lines to restore the SDD if I ever need to:
sudo mkdir -p /mnt/sdb1 (creating a mount point)
sudo mount -t ntfs /dev/sdb1 /mnt/sdb1
sudo dd if=/mnt/sdb1/images/asyymmdd.img of=/dev/nvme0n1 bs=4096 conv=notrunc,noerrer
Thanks in advance.
Bill S.
If you really do have an NVMe, you should read this page, starting from scroll-bar-50%.
https://wiki.archlinux.org/title/Solid_state_drive/Memory_cell_clearing
That will give you some idea, the naming convention is a little more complicated
than expected. Some references to the drive will be /dev/nvme0n1 namespace,
while some references are /dev/nvme device. This is most important,
when studying what the hell all the erase options mean :-/ You may not need to erase your NVMe all that often.
For normal usage of the device, carry on with what you're doing.
*******
When making a backup of the device, there may be better ways to do it.
For the recipe below, I tried to "make" an output, exactly the same as your current method.
It is possible, for example, that only certain areas of the thing need to be backed up.
https://clonezilla.org/show-live-doc-content.php?topic=clonezilla-live/doc/01_Save_disk_image
Say, for example, we purchased a HDD exactly the same size as the NVMe. It turns out, that the "faked" size of the devices, can be the same, for commonality.
I checked a 4TB SSD, a 4TB WD drive, a 4TB Seagate drive, all were 4,000,787,030,016 bytes.
And that is a fake size based on CHS principles. When CHS is involved, the number is
evenly divisible by 63. Each of these devices has more bytes inside, but we cannot
have them.
Steps:
1) Zero out the entire intermediary hard drive. it is now shiny clean, no MBR even.
2) Clonezilla NVMe to intermediary hard drive.
3) Run your regular backup script, pointed at intermediary. Back up intermediary to your external backup drive.
4) Immediately notice size reduction :-) Only the occupied space
is compressed in the output. White space is not taking up space.
The output from (3) can be restored to the NVMe the usual way.
This recipe assumes a lot more backups are done, than restores,
and even if the restore is inefficient (NVMe wear), you're not doing it all that
often, so it's not beating up the NVMe. The lifecycle is shown
in the diagram. The leftmost steps now take a lot of time, but
the .img.gz is smaller so you can make more of them :-)
Clonezilla d2d UsualScript UsualScript
/ \ / \ / \
NVMe Zeroed-out intermediate disk Backup drive (single file .img.gz) NVMe
<=============================== Slower than normal ==============================> <==== Normal speed =====>
Now, before someone sez "Geez Paul, that's an awful lot of effort to get a single output file".
Yes, it is. It's an illustration.
If you use Clonezilla and just image the NVMe, you get all the benefits. The difference
is, the backup sits in a folder and is a folder of stuff. Personally, I *hate* folders of
stuff for backups (that's how Windows does the "Windows 7" flavor of backups, I won't
be using that either, and that's the reason I won't use it).
I want *one* file to represent a point-in-time. And if you say
"well, you could just TAR up the folder and stop complaining".
Yes, you can do lots of things. Is random access into TAR files easy and efficient ?
Or does the software have to read the whole tape to potentially find the item ?
Would my first step be untarring the output to my scratch drive (the intermediate one) ? In the above
recipe, there is no real "handling" going on. I never see a folder full of files. One cookie
comes out of the oven at the end.
Note. I do NOT do "dd" backups on a regular basis. But, I DO know how.
Yes, I have done them. I make safety backups with dd, when testing backup/restore on new backup software.
*******
If you use "fdisk", as part of the output at the beginning ("p" for print), it
states the total size in bytes. Say for example, it reports
4000787030016
factor 4000787030016
4000787030016: 2 2 2 2 2 2 2 2 2 2 2 2 2 3 3 3 7 2584007
The power-of-two size is only 8192 or 8KB. Which is unfortunate, as
this is not a natural size for the Flash device. It got truncated that
way, to make it more closely match the declaration on a 4TB hard drive.
A 4TB SSD, a 4TB WD HDD, a 4TB Seagate HDD, all reported the same size in bytes.
In terms of dd BS block sizes, in this case, you could use
bs= 4096
bs= 8192 <=== a good size for modern storage devices
bs=8192*27= 221184 <=== a good size for legacy hard drives (their cache chip doesn't really work).
This size choice may have slightly less write amplification on an SSD/NVMe.
Bigger is better, until you hit the device limit on write command size.
For example, would 8192*27*7 work ? Maybe.
Paul
On 2023-11-05, bilsch01 wrote:
On 11/2/2023 3:39 AM, Paul wrote:
[...]
With gzip, you have to be careful of the syntax,
so the original file is not deleted. That's what I spent
most of my time playing with, is checking for deletion.
Can you be more specific about what syntax will result in deletion of
original file?
Any invocation on a file (i.e. NOT piped input) that does not include
the '-k' switch.
gzip file.txt <-- will create file.txt.gz, and delete file.txt
gzip -k file.txt <-- will create file.txt.gz, and KEEP file.txt
Piped input (e.g. 'command | gzip ') has no file to keep in the first
place.
| Sysop: | DaiTengu |
|---|---|
| Location: | Appleton, WI |
| Users: | 915 |
| Nodes: | 10 (1 / 9) |
| Uptime: | 21:38:46 |
| Calls: | 12,168 |
| Files: | 186,520 |
| Messages: | 2,233,960 |